A year or two ago, the Chandelier quilt was “all the rage.” It seemed like everyone was doing it, and pictures sprang up virtually overnight—everywhere. I think there were even Facebook groups devoted strictly to the Chandelier. But I managed to ignore the peer pressure, until my peers said, “Hey, let’s do a Chandelier quilt together!” And then, of course, I was in.
But somehow the start time for the sew-along kept getting put off. Eventually, several of them had an upcoming retreat, so they decided that’s when they would tackle this project. Even though I wasn’t on the retreat with them, I put aside that weekend to work on mine at home. (Before you start to feel sorry for me working all by my lonesome there at home, keep in mind that we live in the age of zoom. Of course, even without that, I have Alexa, and she happily blared out Bob Seger radio for me whenever I was sewing. Gotta love Seger!)
But first I had to find the pattern.
Yes, I knew I could buy the pattern at numerous sites online, but I was looking for something a little simpler, a little faster, a little easier…..and frankly, a little free. And I found all that in a pattern online (okay, full disclosure: I didn’t find the free pattern, one of my retreat friends found it and happily shared it with the rest of us). This pattern made the construction of the block itself both simpler and faster, using strip sets instead of small, individual pieces. Putting the whole thing together was a lot easier with these blocks than I think it would have been with the other patterns we’d found. And yes, I’m going to share this wonderful pattern with you! It’s actually called Beads at the Jordan Fabrics website, and you can find it here. Donna Jordan even has a tutorial to go with it on YouTube; it’s on the same page.
I used the Viva Terra line from Studio E for my fabrics.
The pattern calls for 72 blocks, but I went ahead and made 80—to allow for wonky seams, skewed lines, and mismatched corners. I was happily surprised that I didn’t have as many of those as I’d anticipated, so I had a few extra blocks to choose from in my layout.
The layout process was quite challenging. I was using ten distinct fabrics in four or five color families, and “randomizing” both attributes was a little tougher than I expected. I took lots of shots with my phone camera, to help spot obvious mistakes, and I took several in black-and-white, to look at color contrasts. (If you don’t do this already, you’ve got to try it—it makes a huge difference in your layouts!) I don’t remember if I was actually happy with the final layout or if I’d simply given up in frustration, but in any case, I finally had the layout I was going with.
This was the first quilt I’d ever tried to sew together in diagonal lines, as it’s necessarily on point to get the hanging effect of chandelier beads. Oh. My. Goodness. What a challenge that was for me! After a few minor mistakes and one mega-mistake that was absolutely migraine-worthy, I finally got it figured out and got the top put together. Yay, me!
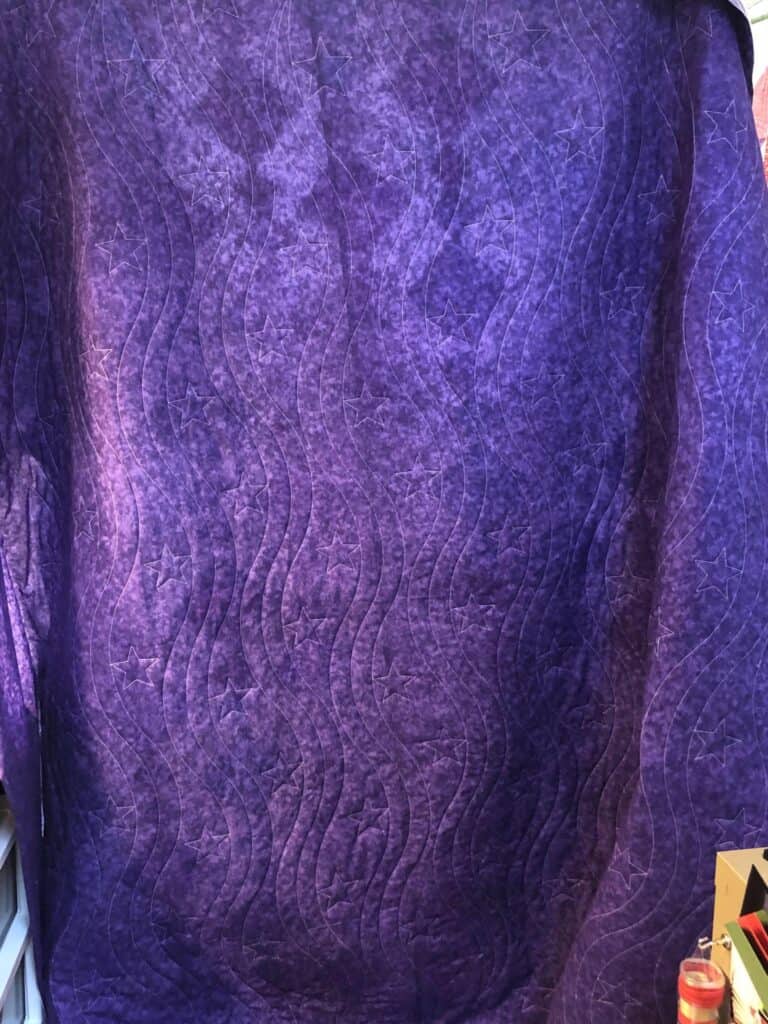
Next came the quilting. I already had a quilting pattern in mind, but I was going to have to do it length-wise, instead of crosswise—it’s a long, flowing pattern, and I wanted it to run in the same direction as the beads. No problem, though: I just loaded the quilt in sideways. Here’s a photo of the back, which shows the quilting much better:

I thought it turned out very nicely.
I didn’t have anyone in mind while I was making this quilt, so when one of my quilting groups said we’d been contacted by a worthy cause who’d asked us to donate one, I eventually volunteered mine (I wanted to wait and make sure it turned out okay). The event—a dinner and Silent Auction—comes up in mid-September, which means I have about a month to get the binding on. Have I ever mentioned that binding is my absolute least favorite part of the quilting process? Well, it is. As a matter of fact, I have four or five quilts ready for binding that I’ve been putting off. So I guess soon I’ll have a huge bind-a-thon weekend.
Oh, joy.